How to reduce the work time of a master? Hardware manicure - “are you still soaking it? Do you get a manicure once a week? forget it! hardware manicure and its advantages. it actually saves you time! how much does a hardware manicure cost at home?” WITH
How long does it take to do a manicure? Which one is relevant now? What types of manicure are there? You will find answers to these and many other questions in our article.
Hands can tell a lot about a woman. They immediately show how she takes care of herself and how she treats herself. This is important because the attitude of other people primarily depends on your self-esteem.
In the modern world, not only for women, but also for men, it is important that both hands and nails are healthy and beautiful. Only through constant hand care can you achieve good results. In this article we will talk about the main types of nail polishing. You can get a manicure done at a beauty salon or yourself.
Women constantly doubt what kind of manicure to do and whether their hands will look better. Each type has its pros and cons, its fans and enemies. In order not to doubt your choice and be sure that this is exactly what you need, you should read about each type and choose the one that is most suitable.
To make a choice and get a truly beautiful manicure, you need to take into account several nuances.
Types of manicure
There are several types of manicure: classic, European, hardware, hot and SPA manicure. But how to distinguish one type from another? In fact, it is not so difficult, because each has its own characteristics:
- Classic manicure is a fairly common type. In this case, the masters remove the cuticle and give the nails their shape. This manicure is also called “wet” due to the fact that during this procedure they often take a bath with warm or moderately hot water.
- European - this manicure method is considered one of the most gentle and gentle. For the reason that masters do not use scissors to remove cuticles.
- Hardware manicure - this type is somewhat reminiscent of the European one. In this case, scissors are also not used. Cuticles are removed using a special device.
- Hot manicure - it is performed using special tools that steam the cuticle and also help restore and strengthen the nails.
- SPA manicure - this type consists of two stages: cleansing and moisturizing. The first stage involves nail preparation and peeling. Then they are moisturized and nourished with special products.
How long does it take to do a manicure?
The question is quite relevant, but it cannot be answered unequivocally. The duration of the procedure varies with each master or at home. In order to roughly understand how long a manicure will take, it is worth studying its technique in more detail (without taking into account the time spent on covering your nails with gel polish).
The first step is to remove the remnants of the previous manicure, if there was one, cut off the cuticle and give the desired shape to the nails, polish the surface with a buff. After this, be sure to treat your nails with an antiseptic and only then degrease them with a special compound. From 30 to 40 minutes - this is approximately how long a manicure will take. How many do craftsmen make it? An experienced master will not take much less time, on average about half an hour. The procedure will be longer if you want to apply gel polish. If you do a manicure in a beauty salon, then each master takes a certain amount of time to do it. It all depends on his individual speed of work, the power of UV lamps, skills, and the complexity of the drawing. This manicure will take the same amount of time as doing shellac. By the way, a classic French coat takes longer to make than a simple plain coating.
So you now know how long it takes to do a manicure and apply shellac or gel polish. But can it really be that important? After all, beauty requires sacrifice, and it doesn’t matter how much time it takes to achieve it.
Manicure that is now in fashion

Designers and stylists attach great importance to manicure; they build on past trends and create something that will be relevant in the coming year or season. They are the ones who tell us what will be fashionable not only in clothes and hairstyles, but even in such little things as nail design.
What kind of manicure is in fashion? At the moment, a simple, neat and laconic manicure is relevant, suitable for both everyday life and holidays. Monochromatic coating is gaining popularity. But you have to be careful with bright red and black manicure, which is not always suitable for an everyday look.

Not a season is complete without a practical and already traditional French and lunar manicure. They are always relevant. These two types go well together and allow you to create original variations.
Colors that are trending this season

Bright colors are in fashion. This summer, fashion critics suggest using blue, pink, yellow colors in combination with pastel shades, floral and fruit prints.
But in autumn and winter, preference should be given to a matte finish. Cool shades will be in fashion. Critics also claim that the entire wine color scheme is at the peak of popularity.
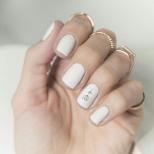
How to increase work speed? It takes me 3 hours, it’s a very long time to get settled in the salon and the clients there are not very happy because
. for a long time, today I sat with a manicure and coating for 2 hours 40 minutes (the design was triangular empty holes with a silver outline around the edge) the client first saw my designs and made an appointment in advance, and then after finishing the work she made an appointment with another master, saying that she was not going to sit for three hours, and constantly sighed while working and showed with all her appearance that she was tired of sitting, I was very upset, I understand it’s my fault, I’ve been working for a long time (I think maybe this isn’t my thing at all? I graduated from the courses two weeks ago and they weren’t particularly educational, I didn’t learn anything new ( I worked at home before and it seems to me that it worked even faster at home. Photos of the work done in the salon. Tell me how to reduce the work time?


A special gel polish, shellac, appeared on store shelves, and immediately attracted attention, fell in love, took root, and many women have since recognized only this type of manicure. The coating itself is made on a resin base taken from tropical trees, and thanks to modern technologies it has a chic appearance.

The coating itself is made on a resin base taken from tropical trees, and thanks to modern technologies it has a chic look
Read the popular article in the category: An effective drug - Mikoderil varnish for nail fungus. Reviews, price.
The first advantage is how long shellac lasts on your nails. To the delight of women, it lasts for more than 3 weeks, but does not lose its qualities and looks the same as after the application procedure.
Second: it successfully replaced nail extensions, which still cause damage to nails. Shellac is suitable even for those who have fragile and weak nails, because it does not spoil them, but on the contrary, its natural components heal and protect such nails.
Like most good products, shellac immediately began to have many fakes, which is further proof that this product is really good. Please note! To purchase natural shellac, you need to know what the bottle from the manufacturer looks like and what labels are on it.
Any product has its own serial number, so by the barcode you can find out the country of the manufacturer, where the product came from, batch series, etc. Such varnishes from the American corporation CND are especially popular. It is believed that only they have the right to be called “shellac”. Many people order them directly on the site.
But if you happen to have a bottle in your hands (you can request it for examination in a beauty salon), then the label on the original packaging is not as shiny as before, and the film completely covers the container itself. The sticker on the main side is white and yellow and the lettering is thin and very clear.

On the original packaging, the label is not as shiny as before, and the film completely covers the container itself. The sticker on the main side is white and yellow, and the lettering is thin and very clear
At the bottom of the bottle there is always a distinctive sign - a flower, and on newer varnishes the serial number of the batch is repeated, which is already recorded on the packaging. The bottom has smooth edges and is oval.
You can spot fake gel polish by its smell. The original one smells pleasant, like all quality products, but the fake one has a strong chemical and unpleasant odor.
How long does it take to correct nails? How many times can extended nails be corrected?
Svetlana
Nails grow quickly. I forgot to ask the master how many times can you correct gel nails? I hope not alone?
Expert answer:
First of all, you need to understand that you cannot constantly walk around with such nails. Relatives need to be given rest. Therefore, a qualified master will advise you to remove your nails after the second or third correction and recommend how to improve their health. The question of the number of corrections must be decided individually. After all, in some representatives of the fair sex they grow back very quickly. Others, on the contrary, say that their regrowth occurs very slowly throughout their lives. They won’t need to touch up their artificial nails as often as others. If a design is also made on the extended nails, then they simply will not survive more than two corrections.
On average, after extensions, specialists advise you to come to them again after 2-3 weeks. And it’s still better to go for correction to the master who did your artificial nails. He will cope with the results of his own work faster than another specialist. And each master uses his own materials for work; everyone has an individual approach to work. As for the cost of correction, we should focus on 50% of the price that was paid for the initial service.
Often women are interested in what to do if the artificial nail breaks for some reason. It will not be possible to correct it; you will need to build it up again.
Today, many people are engaged in providing such services. In principle, every woman has the right to choose the master from whom she likes to be served and whom she trusts. But sometimes, in trying to save money on the beauty of your nails, you can, on the contrary, lose money, because inexperienced nail technicians do not always adhere to technology and often use low-quality products and materials. As a result, after just a few days the coating chips off or the nails break. The latter can happen because the woman’s natural nails are too thin, and a good nail technician would advise first strengthening them and then extending them. And for those with not too strong nail plates, biogel is often added to the gel as a strengthening agent.
Acrylic nail extensions are used to quickly correct their length and shape. This service is offered by almost all beauty salons and private hairdressers. For extensions, special acrylic nail powder and liquid (a special liquid solution), as well as removable or non-removable forms are used.

Stages of the procedure
Preparation. The master will apply an antiseptic to the client’s hands, and then treat the nail plates: sand them with a file or router, polish them with a buff. He will also remove cuticles and hangnails using a hardware attachment. Therefore, there is no need to trim your manicure immediately before extensions. After cleaning the dust that has formed as a result of grinding, the nail plates are coated with a degreaser.
Application of modeling composition. After fixing the extension form, the technician wets a thin brush in liquid and dips it into a container with acrylic powder. As a result, a gel-like viscous drop is formed, which is applied to the edge of the nail and distributed evenly over the entire plate.
The peculiarity of acrylic extensions is that it does not require the use of an ultraviolet lamp. The mixture dries on its own, and then the master corrects the shape of the nail using a file.
Covering nails with varnish – applying decorative varnish, painting, sculpting, etc.
On average, the procedure takes 2.5-3 hours: the exact duration depends on the complexity of the nail art. Extensions at home may take longer than in a specially equipped specialist’s office.
Acrylic extension options
Modeling the length of nails is carried out in the following ways:
For tips. This method is considered easier: the master glues plastic or silicone forms to the edges of natural plates, which are then adjusted with a nail file. Extension with tips takes less time, but subsequent removal of the material can become more traumatic.
On the forms. In this case, a disposable removable stencil is used, which allows you to lengthen your nails using an acrylic mixture. Extension onto forms requires a little more time and special care from the master.
What is necessary:
- base coat,
- Colored gel polish,
- Top coat (fixer or topcoat),
- Degreaser,
- Ultraviolet lamp,
- Cuticle oil,
- Sanding files,
- Cuticle remover tool
- Orange stick.
Progress
Step 1. Get your nails in order: give the desired shape, clean them, remove cuticles. Next, use a buff file to sand the nail plate. This is necessary for better adhesion of the coating to the nail. Pay special attention to the edges and base of the nail.

Sand the nail plates with a buff file
After this, wipe your nails with a cloth previously moistened with a degreaser. By the way, if this is not the case, then you can use alcohol or nail polish remover.

Wipe your nails with a sticky remover
Step 2: Now start applying the base coat. Apply it as thinly as possible. Paint the plate thoroughly from the outside and inside, this is necessary so that the manicure lasts longer. Then place your nails under an ultraviolet lamp for 1-2 minutes (if the lamp power is less than 36 W, then you need to dry longer).

Apply base coat
When creating a manicure with gel polish at home, it is recommended to use a 36 W UV lamp. However, this coating can dry out even in less powerful lamps. (For example, I used a 3 W lamp, the coating is also fixed, although I increased the polymerization time.)

UV lamp for drying manicure with gel polish 3 W
A little later I purchased a 36 W lamp, the difference is very noticeable. The drying time has been reduced, and the coating itself is much stronger. I ordered a 36 W lamp on AliExpress for 750 rubles. Oddly enough, the old 3 W lamp was more expensive - 900 rubles, but was bought in a Russian online store, like all the other manicure products from this article (store - nogtishop). Lately I’ve also been ordering gel polishes from Ali, they also come out much cheaper (between 70 and 100 rubles per bottle), and the quality is no worse. For comparison, the varnishes presented here were purchased for 260 - 280 rubles (now they have become a little cheaper). On Ali you can order saws and orange sticks. To compare prices, I posted a screenshot of my order from Nailshop below. I repeat, now nail polishes in Nail Shop have become cheaper. Just for fun, go to Ali and compare prices.

My order of tools and products for manicure with gel polish

36 W lamp with timer, ordered on Ali for 750 rubles.

View of the UV lamp from the inside
Step 3. The next step is to apply colored gel polish. The first layer of shellac should be thin. It should be applied very carefully without touching the skin. If the polish gets on your skin, remove it with an orange stick. There is no need to paint the inside of the nail with colored varnish. Next, place your hand under a 36 W lamp for 4-5 minutes.

Apply colored gel polish
Step 4: Next, apply a second layer of color. It may be a little thicker than the first one. The second layer will make the color more saturated and vibrant. After applying it, also polymerize the manicure under ultraviolet light for 5 minutes.

If desired, you can decorate your nails with rhinestones
Step 5: Now coat your nails with sealer. It is thanks to this top product that the nail polish stays on for a long time and is durable + will acquire a beautiful glossy shade. Paint the nail plate thoroughly with it, “sealing” the manicure from the inside of the nail. It is advisable to apply two layers of topcoat, drying each of them in a lamp, in which case the manicure will last a very long time. Dry each layer of topcoat under the lamp for 2-3 minutes.

Cover your nails with a top coat

Paint the inside of the nail with fixative.
Step 6. The final stage is to remove the sticky layer from the nails using a degreaser. If this is not the case, you can use alcohol or nail polish remover.
Step 7: As a final touch, pamper your fingers with cuticle oil. Apply it to the skin at the base of the nail and rub in.

Apply cuticle oil
To make your gel manicure last longer, remove any excess gel polish that protrudes from the sides of your nails using a regular metal nail file.

Video 6 WAYS TO SHORTEN MANICURE TIME/How much time
How long does a hardware pedicure take? Who is suitable for hardware pedicure?
Hardware pedicure is one of the varieties of European unedged pedicure. Before the procedure, the feet are not steamed in a foot bath, as in a classic pedicure, but are treated with a disinfectant solution, after which a special softening composition is applied, due to which dead particles are exfoliated, and the pedicurist (using a device with various types of attachments) removes only dead skin.
The master does not use cutting tools, which makes the procedure safer than a trim pedicure. It is worth noting that the hardware method is suitable for pregnant women, people with diabetes and fungal diseases. Another plus: the procedure takes less time than a classic trim pedicure. After it, it is effective to do paraffin therapy (the skin is cleansed and not injured, which means it is well prepared for care).
Expert opinion
Hardware pedicure is a real salvation for a client who wants to get rid of corns or calluses. With a classic pedicure, mechanical damage occurs to the living layers of the skin - and after a week the corns begin to grow again, and become even thicker. Hardware treatment is more gentle and correct in this fight: corns do not become thicker, the effect of a fresh pedicure lasts significantly longer.
It is important to maintain regular hardware pedicures (once every three to four weeks) - and after just a few procedures, your feet will noticeably transform.
It is hardware pedicure that is preferable for pregnant women, as it is non-traumatic. During pregnancy, it is recommended to apply varnishes based on fruit acid. The coating components moisturize and nourish the nail plate, making the pedicure not only beautiful, but also absolutely safe.
Gel-coated nails do not require additional strengthening and look natural. The gel coating lasts a long time, protects the nail plates from fungus, and also allows you to grow strong nails, preventing their splitting.
The procedure for applying professional material is similar to painting nails with regular varnish. The only difference is in the method of preparing the nail plates and drying the applied layers.
Important. Choosing a good master is the main step to creating beautiful and well-groomed nails for a long time. A professional manicurist uses only one brand of base, color and top coat.
The procedure for creating a manicure takes no more than an hour. Knowing its specific algorithm, you can control the master at all stages of work.
- Step 1.
Pre-treatment of nails and cuticles. To prepare the nail plates, masters mainly use unedged manicure, giving them the same shape. This is followed by grinding, degreasing and coating with a base product that improves the adhesion of the material to the nail. After applying the primer, you should not touch the top of the nail, as this will damage the thinnest layer of the base product.

- Step 2.
When applying a colored layer, the manicurist must be extremely careful. If the material gets on the cuticle area or skin, it will quickly cause the varnish layer to peel off from the nail plate. Each layer is applied evenly and then dried under a UV lamp.
- Step 3.
The top coat should be applied thinly. After applying the topcoat, the nail can no longer be filed or modeled.
Working hours. Rational allocation of time, reduction methods.
Having done several manicures, extensions and corrections, we all already have a rough idea of how long this or that service takes. In most cases, you want to reduce it, without losing quality, of course. This article presents methods to reduce procedure time.
So, let's start with the fact that we need to accurately determine the average time required for the procedure. For example, let’s take a “under-varnish” correction, which takes 2.5 hours.
The time for manicure and extensions should always be calculated without taking into account the time for choosing varnish, varnish coating, or design - this is a separate time.
Of course, you won’t be able to immediately reduce the time to one hour. Therefore, we set ourselves the task of reducing the procedure by 30 minutes, taking 15 minutes as an intermediate goal.
Now comes the hard part. It is necessary not only to determine the working time, but also to analyze exactly how much each movement takes. When working with a client, look at the clock and see how much time it takes you to lay out, file, varnish, etc.
For our example, we create the following simple table:
The total was 133 minutes.
The remaining 47 minutes are spent treating hands with disinfectant, discussing length and shape, laying out napkins, opening jars, possible distracted actions (talking on the phone), etc. In addition, it is quite difficult to guess how much work will be done during correction - there are broken nails or detachments. That is why, as an example, we took a correction with one broken nail.
Now we carefully look at our result and analyze. Which stage takes the most time?
Usually this is a laying out of material, or sawdust. Of course, to learn how to do this quickly and efficiently, you need constant practice and advanced training.
The sawdust time can be reduced by using a machine (drill) during work.
But more often than not, it’s the “extra body movements” that take up most of the time. Reducing your time on them is very simple and very profitable.
Here are some practical tips:
Try to keep all the necessary materials and tools “at hand” so that they can always be easily taken out and put back if necessary.
Always label your jars if you are using single-color containers for ease of handling.
On the lids of jars of colored gels and acrylics, make a dot from this material - this way it will be easier for you to find the right color. The same can be done with varnishes.
When communicating with a client, do not stop working, just listen or speak, but do not look up at him. When discussing shape, length, desired design, also keep working. Tell the client to start choosing a design/color of polish 5-10 minutes before the end of the procedure.
Also, I want to note, in my opinion, one of the most effective methods of reducing work time is
Participation in the competition
More details about participation in competitions are described in other articles. In this one, we will consider only the part that directly affects the operating time.
When preparing for a competition, you simultaneously train to work “for quality” - i.e. perform the work according to all criteria, and “on time” - in order to meet the time set by the organizing committee. By constantly working on this and tracking your work time, you will soon understand, without tables, what takes up the most time.
The only thing that is omitted during the competition is opening jars, wiping a glass of monomer, etc. This is all done in advance, and the model usually helps with this.
This is the huge advantage of participating in the competition. Even if you do not take prizes, you will gain enormous experience, and the time and costs of the competition will soon pay off due to the increase in your professionalism and work time.
Every time the master explains to clients that a good manicure cannot be done quickly. But still, what can be done to make the whole procedure go faster? We'll tell you in this article!
- Trite, but effective. Discuss with the client in advance what color she wants. Of course, she may change her mind many times, but if during the manicure she already knows exactly the color of the gel polish, this will significantly reduce the time of the entire procedure
- Complete the designs on tips in advance so you don’t have to look for and go through photos of designs with the client before making them.
- Ergonomics of the workplace. If you are right-handed, it is more convenient for bases, tops, lint-free wipes and anything that is often used to be on your right. Take a close look at your workspace and think about what you use most often and where it is located in the office. Do you have to get up and go for something or is it right at your fingertips?
- Know the procedure clearly. Of course, if you are confused about the procedure for manicure, this will increase the procedure time.
- Have a supply of files or cutters of different abrasiveness. A manicure can be done with one cutter, but different cutters should be used for different hands. If you use soft cutters with rough skin, the manicure time will increase.
- Work in a conveyor manner: process the cuticle with a fissure cutter (or any other one you start with) on all 10 fingers at once, and then work with other cutters.
- Use quality equipment and materials:
- If your manicure machine is low-powered, it will be more difficult for you to get a good and clean manicure.
- Use high-quality bases and tops that you feel comfortable using for leveling.imkosmetik master technologist Elena But recommends trying base coats, or, CND Duraforse tops And CND Xpress 5. But of course you have to agree, each master selects bases and tops individually.
- Colored coatings that do not require 3 or more layers. Try colored gel polishes from, , or.
- Learn how to do a subcuticle manicure with a brush from a bottle. This will significantly reduce the time of applying the color coating. Learn this or try to work with a thin brush not on every layer of gel polish.
- Time yourself and give yourself a certain amount of time to complete a particular stage. Find a moment that you have been doing for a long time and work on it.
- Reduce the number of conversations with the client! Yes, clients come not only to receive a service, but also, as often happens— speak out. But you shouldn’t actively engage in the conversation, because rarely anyone can afford to combine active conversation and manual actions. Most often, your work speed suffers because of the conversation. Put a TV in your office so that clients can watch what they want if they want, and you, in turn, will do your job efficiently.
What harmful activities are you still doing? Share your stories in the comments!
Is it possible to wear gel polish for 3 weeks? What if I wear gel polish for a month?
Or is it better to do a new one after two weeks of wear?
Technologists It is not recommended to wear gel polish for longer than 2-3 weeks.
No, this is not because gel polish is harmful, your nails need rest or anything else.
All this is nonsense, the reason is different.
I decided to write this post when today I was once again freaking out about my overgrown nails.
Overgrown nails are wildly inconvenient, and they also break easily from any careless movement.

This is what my nails look like after a month of wear.
Not pretty. One nail is cracked and will need to be repaired.
The necessary theory about the wearing time of gel polish
Nails grow - this is the main reason that forces us to update our manicure and re-cover them with something.
Look, when you come to the master, your old coating is removed and gel polish is applied to a clean nail. So?
When a master, he should not just apply a base to you first, then gel polish, and then a top coat. No, the master shapes the nail architecture.
The correct architecture allows you to wear gel polish on your nails longer.
There is such a thing as a nail stress zone.- This is the place where the nail most often breaks.
When the master forms the correct architecture, the stress zone is closer to the base of the nail. Closer to the cuticle. That is why you are unlikely to break a nail on which gel polish was applied yesterday.
As the nail grows, the stress zone moves from the base to the edge of the nail. The length of the nail also increases. At the same time, the risk of breaking a nail increases.
This time is enough to enjoy a new manicure, show off to your colleagues at work, or go to the sea, but not enough for your nails to grow and begin to cause you discomfort.
How to determine the nail stress zone.
How long can you wear gel polish?
You already understand that on average it is advisable to wear a manicure for 2-3 weeks. But still people are different. How can you determine how long you can wear gel polish?
There is a simple test that gives a clear answer to this question.
- Remove the coating to leave your nails clean. Without any coverage at all.
- Press the free edge of the nail so that the part you pressed turns white
- The border between the pink and white parts of the nail will be the stress zone.
As a rule, the stress zone on clean nails is approximately in the middle of the nail, a little closer to the cuticle. Up to this very point you can wear the old coating and not update your manicure.
Every day the stress zone will move closer to the edge of the nail. As soon as it gets very close (in 2-3 weeks), you will have every chance of getting a crack, or even breaking your nail.
What happens if you wear gel polish for more than three weeks?
It all depends on your individual characteristics and the speed of nail growth. If your nails don't grow very quickly, then please. Can you wear gel polish for at least a month?
About the growth rate of fingernails
In an adult healthy person, the nail plate is renewed on average in 2-4 months (depending on who it is). Nails on the left and right hands grow at different rates. If you are right-handed, your nails will grow faster on your right hand. If you are left-handed, then vice versa. Even on the same hand, the rate of nail growth on different fingers will be different. So nails grow fastest on the middle fingers, and slower on the big and little fingers.
These differences are so small that visually we do not notice them. But we most often get chips and cracks on those hands and on those fingers where nails grow fastest
Problems caused by wearing gel polish longer than expected
Yes, it's not very beautiful, but it's not the worst thing.
The main problem, as I already said, is the risk of breaking a nail
Another problem is detachment of overgrown nails at the base.
You've just had your coating done. At the base, this very coating is hidden under the cuticle, and everything is hermetically “packed.”
After a week, the edge of the coating at the base of the nail begins to peek out from under the cuticle (the nail is growing). Further more. The base, which should have been under the cuticle, moves to the edge of the nail and begins to peel off a little in this place. Water, dirt, hair, and everything else begin to clog into this “gap.”
Personally, this is very inconvenient for me. For example, when I wash my hair or do my hair, the hair gets stuck in the areas of detachment at the base, and it’s just terrible. It becomes completely impossible to get yourself in order. Even untying a knot on a grocery bag becomes a problem.
- After 2-3 weeks, the quality of adhesion of the coating to the nail plate decreases, and air pockets and detachments may appear.
- Water, dirt, and any nasty things that get into places where the material is detached can cause the development of pathogenic microflora. The fungus, if you catch it somewhere, will feel great in such places.
Overgrown nails are not only not beautiful and not convenient, they are also a little more expensive. When I once again forget to make an appointment for a manicure on time, I consistently end up with 1-2 cracked nails. These cracks have to be repaired for an additional fee during the next manicure.
So it turns out that irregular visits to the master entail a whole series of problems and inconveniences for the owl?
Hyponychium is another reason to update the coating on time
 Hyponychia- this is the skin under our nails. It protects the body from all kinds of infections and viruses when dirt gets under our nails.
Hyponychia can often “stick” to the bottom of the nail plate. If you walk around with gel polish for a long time, the nail grows a lot and pulls out this same hyponychium. And this is a piece of living skin for a moment.
The next time you come with overgrown nails for a manicure, and the master starts to remove the length with a file, it will hurt. This is because, along with the nail, the master will file off this very piece of living skin. And there’s nothing you can do about it - just renew the coating in time, and don’t let the hyponychium grow too long.
How to stop wearing gel polish for longer than expected.
As an option, immediately after the next gel polish application, immediately make an appointment with the specialist for the next session. We professionals love it when clients do exactly this. You know in advance that in two to three weeks you are scheduled to visit a manicurist. Personally, I try to contact the client before the appointment and remind her that we have a meeting tomorrow. This is exactly what you need. This way you won’t be able to “oversleep” the moment when you need to update the coverage.
Another option is to set a reminder in your phone. She will remind you every two to three weeks to make an appointment for a manicure. But this method has a big drawback. There is often a “queue” for good masters. If you call the specialist in two weeks in the hope of getting a manicure tomorrow, there may not be any vacancies. Then you will have to wait several days and walk around with overgrown nails, and this, as you yourself know, is not very convenient.
Remember:
- You should not wear gel polish for longer than 2-3 weeks.
- If your nails grow slowly, you can wear your nails longer.
- Determine the stress zone of your nails to know how long you can wear gel polish without the risk of cracks and chips.
- If your nails begin to peel off at the base, break, and the last time you had a manicure was more than a month ago, this is a reason to renew the coating.
- If you see a hyponychium (long edge of the skin) on the inside of the nail, run to a manicure.